
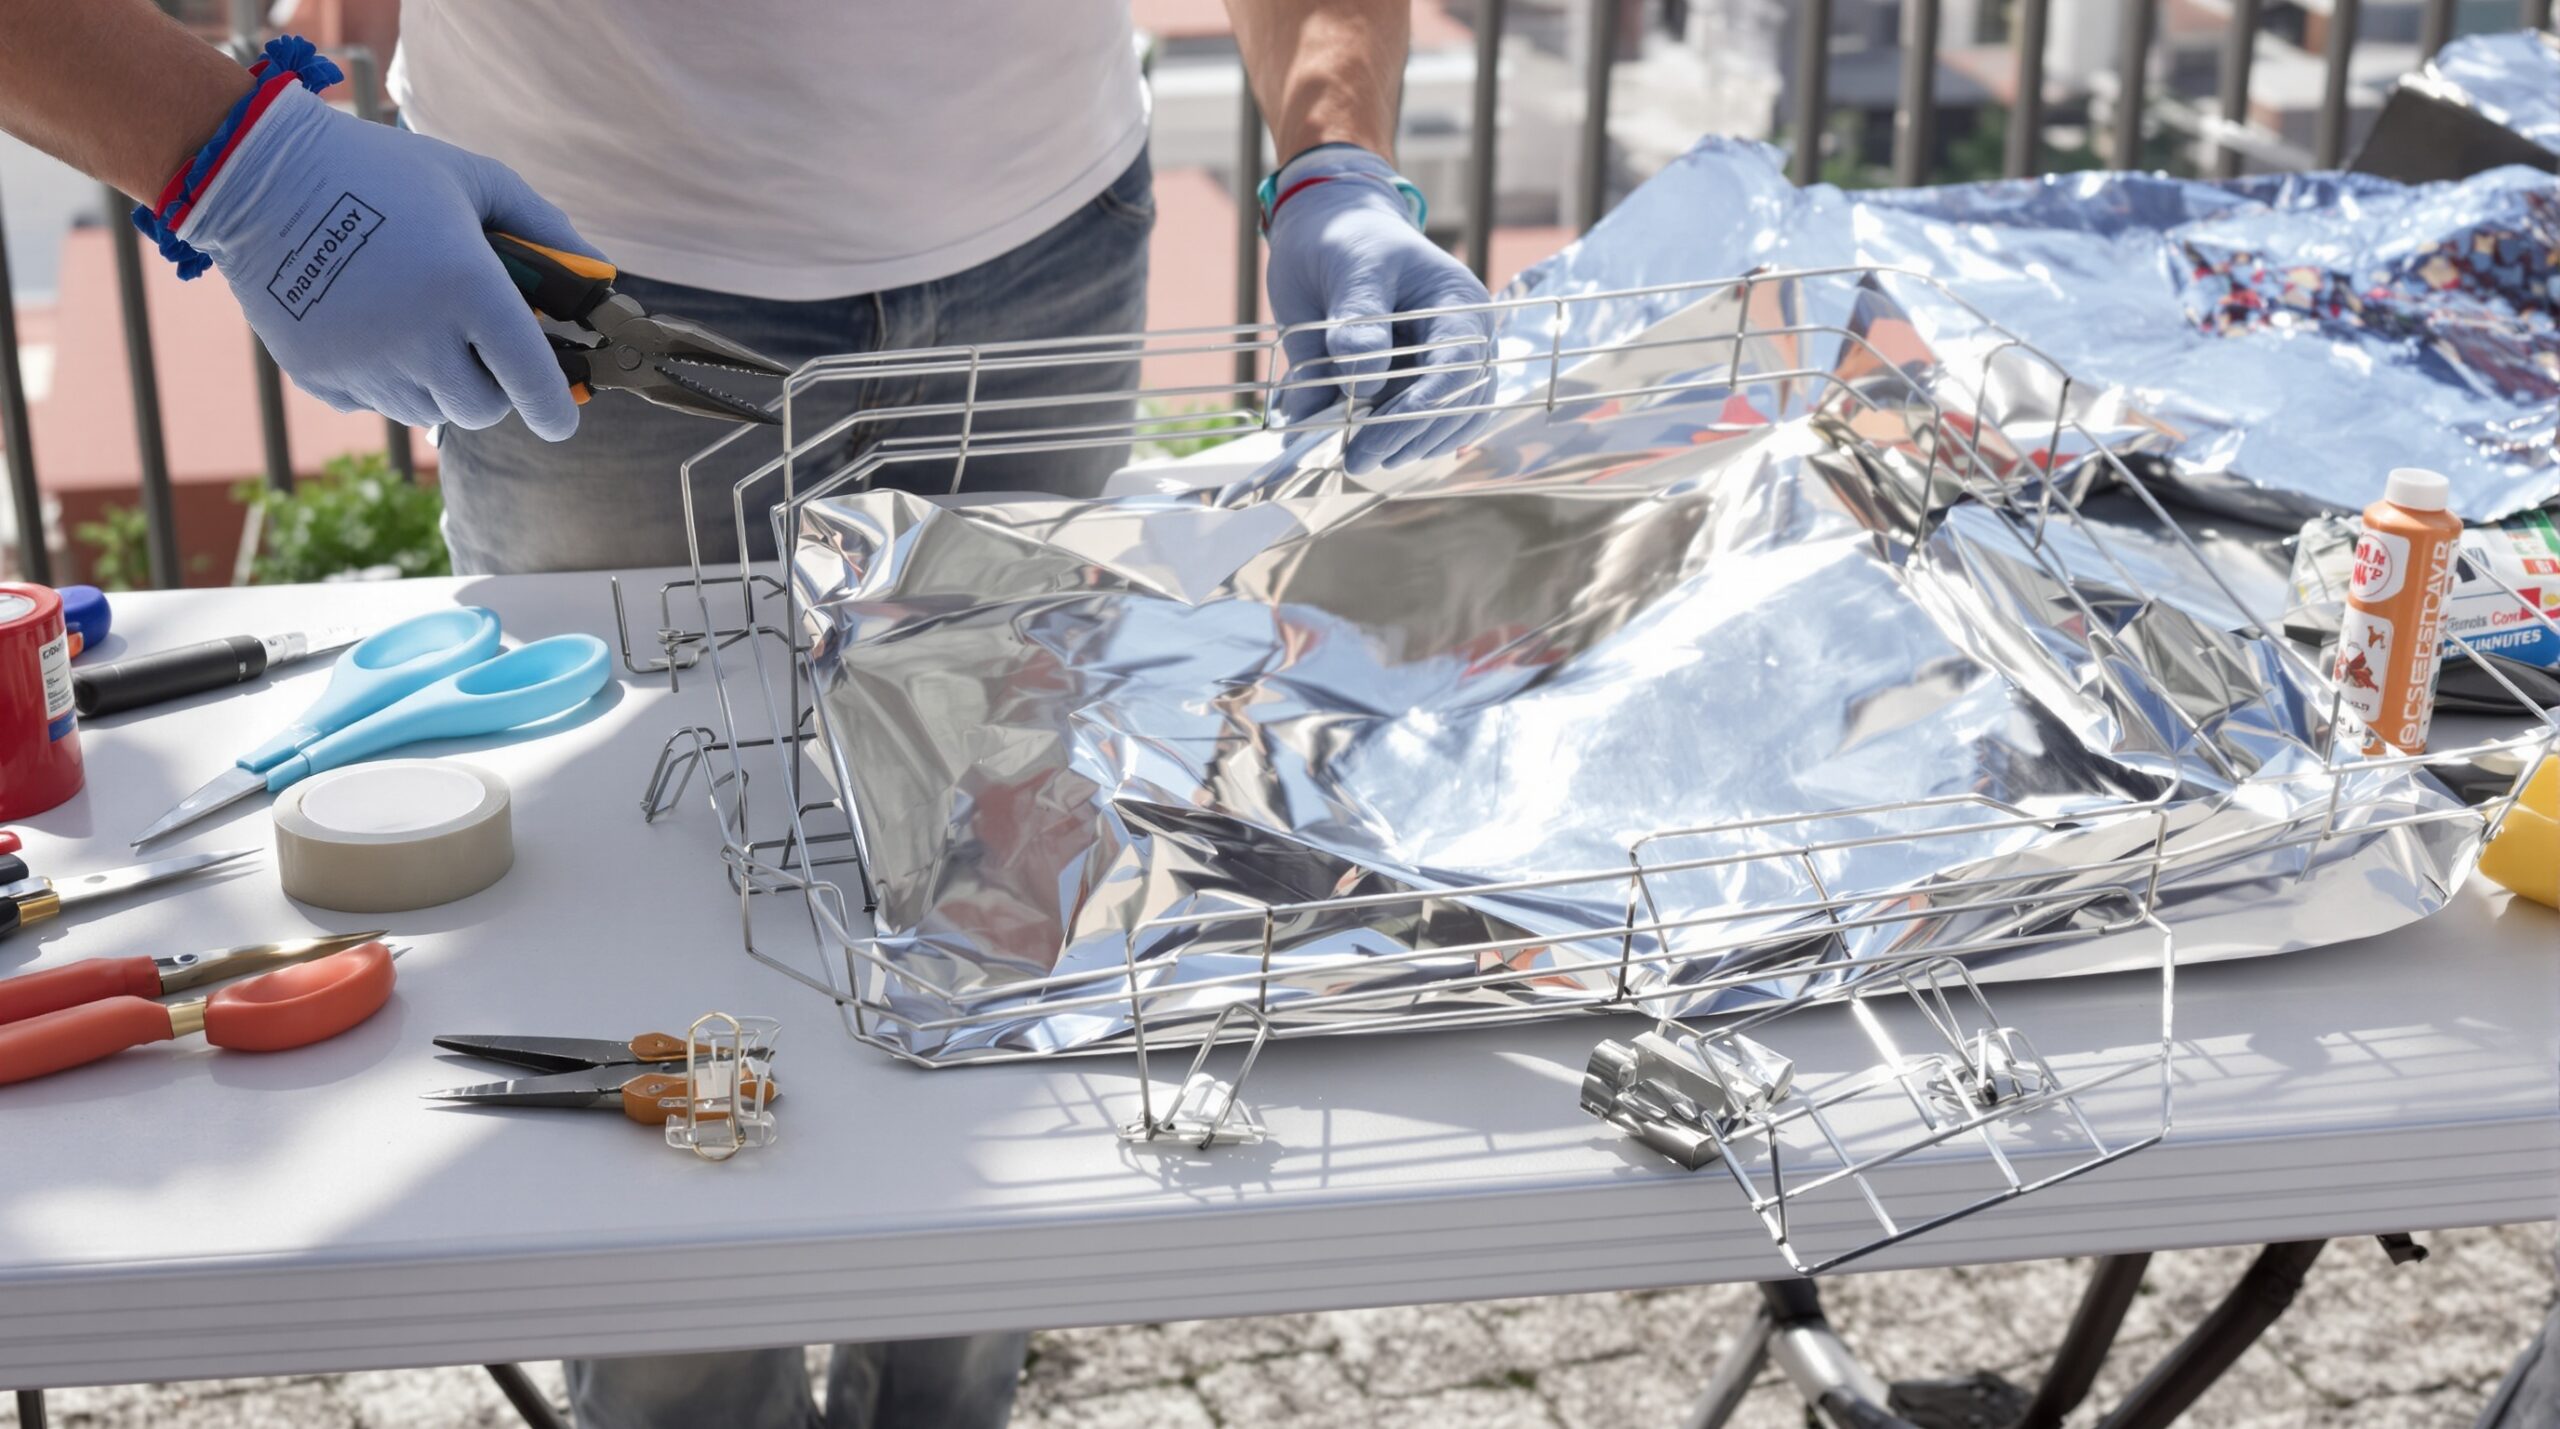
Sunlight can cook meals without fuel, smoke, or noise. With simple materials, you can build a capable solar cooker. This design folds flat, packs light, and sets up quickly. Reflective emergency blankets and wire hangers keep costs very low. It suits camping, emergency kits, and backyard experiments. Better yet, the project teaches practical energy principles. Let’s explore the build, operation, and safety considerations. Then you can modify the cooker for your needs. First, gather parts and tools that balance durability, weight, and cost.
Materials and Tools
- Two emergency mylar blankets, standard size, at least 52 by 82 inches each.
- Twelve to sixteen metal wire hangers, uncoated if possible, 14–16 gauge.
- Cardboard or thin corrugated plastic, enough for five panel templates.
- Strong tape, like cloth gaffer’s tape or reinforced filament tape.
- Clear packing tape for seams and spot repairs in the field.
- Contact adhesive or spray adhesive compatible with mylar films.
- Binder clips, jumbo paper clips, or small spring clamps for assembly.
- Elastic cord or hook-and-loop straps for flat packing and closure.
- Black, lidded pot or dark enameled saucepan, with a tight glass lid.
- Clear oven-safe roasting bag to create a greenhouse sleeve.
- Small trivet or three nuts to lift the pot for airflow.
- Measuring tape, scissors, pliers, marker, and safety glasses.
These materials keep the weight low and cost minimal. Next, review the design so each part supports efficient solar capture.
Design Overview
This cooker uses a panel design that concentrates light onto a pot. The reflective panels make a shallow cone around the pot. The pot sits near the focus, within a clear oven bag. The bag reduces convective heat loss and boosts temperatures significantly. The design folds flat because each panel hinges on tape seams. Hanger wires reinforce edges and form adjustable struts.
A practical reflector area is 0.7 to 1.0 square meters. This area balances portability and cooking performance. Under clear midday sun, expect pot temperatures above 100 degrees Celsius. Water can be pasteurized and eventually simmer under good conditions. Thin mylar reflects 85 to 92 percent of visible sunlight. Multiple reflections add losses, so aim for clean, smooth surfaces.
Choose a matte black pot for the best absorption. The tight lid traps steam and prevents heat loss. A glass lid helps you monitor food without opening the bag. The trivet lifts the pot slightly, allowing reflected light under the base. With the concept clear, you can start building the folding reflector.
Step-by-Step Build
- Plan dimensions that fold into your backpack or bin. A folded panel size of 30 by 45 centimeters packs well.
- Sketch five panels shaped like trapezoids and rectangles. The assembled shape should resemble a shallow, open cone.
- Cut panel templates from cardboard or corrugated plastic. Dry fit them into a cone around your pot for verification.
- Flatten the emergency blankets carefully on a clean surface. Avoid sharp creases that reduce reflectivity and durability.
- Lightly bond the reflective blanket to the template panels. Use minimal adhesive to prevent wrinkling and melt damage.
- Trim the mylar flush with each panel’s edges. Leave no loose flaps that can catch wind or tear.
- Reinforce panel perimeters with gaffer’s tape. Create clean, straight edges for strength and easier folding.
- Create hinges between panels using tape on both sides. Leave a tiny gap so panels fold freely without binding.
- Form wire hangers into edge stiffeners using pliers. Follow the panel edges and tape the wires securely in place.
- Bend two hangers into adjustable support struts. Add small hooks that clip between opposite panels for angle control.
- Install elastic loops or hook-and-loop straps. These wrap the folded panels for transport and storage.
- Test-fold the assembly flat and reopen it fully. Confirm smooth hinges, secure edges, and stable geometry.
- Create a simple pot stand using three small nuts. Tape them to a thin, heat-safe disk as a trivet.
- Check fit of pot and oven bag together. The bag must clear the panels and allow sunlight coverage.
- Add stake loops or small corner holes for pegs. These prevent movement during breezes or gusty conditions.
Your cooker should now open into a rigid, reflective cone. Before cooking, learn how to aim and operate the cooker effectively.
Aiming and Operation
Place the cooker on a firm, level surface facing the sun. Angle the panels so sunlight concentrates on the pot center. Adjust the struts to steepen or shallow the cone. Keep the opening slightly narrower than the panel width for focus.
Load food into the black pot and secure the lid. Slip the pot and trivet into a clear oven bag. Close the bag loosely with a twist or clip. Leave a small gap to prevent pressure buildup and allow moisture to escape.
Sunlight should illuminate the pot sides and base. Rotate the cooker every 20 to 30 minutes for consistent heating. Keep the cooker low to the ground in windy conditions. Use pegs or weights if gusts threaten stability.
Expect slower cooking than gas or parabolic cookers. Plan meals that tolerate gentle heating and longer times. Soups, rice, beans, and vegetables cook reliably with patience. With practice, you will refine timing and positioning.
Performance Expectations
Under clear midday sun, temperatures can exceed 120 degrees Celsius inside the bag. One liter of water may simmer in 60 to 120 minutes. Half a liter often heats faster, around 45 to 90 minutes. Thin mylar works, but stiffer mirror film performs better. You can pasteurize water at 65 degrees Celsius for safety. A water pasteurization indicator simplifies verification during field use.
Safety and Food Handling
- Protect your eyes from glare using sunglasses or a cap brim.
- Do not stare at concentrated reflections on the pot or bag.
- Handle hot cookware with gloves or folded cloths to prevent burns.
- Keep children and pets away from hot surfaces and reflective glare.
- Use a stable, nonflammable surface well clear of dry vegetation.
- Never use the cooker indoors or inside closed vehicles or tents.
- Follow food safety temperatures to avoid illness and spoilage.
- Reheat leftovers to at least 74 degrees Celsius for safety.
Safe operation builds confidence and protects your gear. With safety covered, consider weather and site conditions that affect outcomes.
Weather, Site, and Seasonal Factors
Clear, high sun provides the strongest cooking performance. Thin clouds reduce energy significantly and slow cooking. Winter sun sits lower, requiring steeper panel angles. Shorter days also reduce available cooking time.
Choose a site with unobstructed sun for several hours. Avoid shiny surfaces that could redirect glare problematically. Block wind using natural features or low wind screens. Always secure the cooker with stakes or weighted bags.
Troubleshooting
- If food cooks slowly, increase reflector angle and re-aim frequently.
- If wind shifts panels, add more stakes and reinforce wire edges.
- If mylar wrinkles, gently warm it in sun and smooth with a cloth.
- If the bag fogs heavily, crack a tiny vent near the top.
- If hotspots appear, rotate the pot for even heating and protection.
Small adjustments often yield large performance gains. Methodical testing will quickly improve your results across conditions.
Maintenance and Storage
Let the cooker cool before folding it flat. Wipe mylar surfaces with a soft, slightly damp cloth. Avoid abrasives that scratch and reduce reflectivity. Inspect hinges and wire edges after each session. Tighten tape and replace damaged panels when needed. Store the cooker in a protective sleeve or envelope. Keep it dry and out of direct sunlight when stored. Proper care extends life and maintains performance.
Upgrades and Variations
- Replace cardboard with corrugated plastic for waterproof, durable panels.
- Use thicker metallized polyester film for improved reflectivity and stiffness.
- Add magnetic clips for quick connections along wire-reinforced edges.
- Build a folding, clear polycarbonate windscreen for gusty conditions.
- Include a simple sun finder to speed accurate aiming adjustments.
- Scale the design to fit larger pots for family meals.
These upgrades maintain the fold-flat character while boosting capability. Choose improvements that match your budget and usage patterns.
Why It Works
Sunlight delivers up to 1,000 watts per square meter at noon. The panels collect and redirect part of that energy. The black pot absorbs light and converts it to heat. The oven bag reduces convective and evaporative losses significantly. Together, they push temperatures high enough for practical cooking. Clean surfaces and good alignment preserve available energy.
Packing and Field Use
Fold the panels along hinges and secure with straps. Pack the trivet, bag, clips, and stakes alongside the cooker. Wrap the pot separately to prevent scratches on the reflective surface. Keep the kit accessible for quick setup during breaks. Field practice improves speed and consistency. Leave no trace and pack out damaged materials carefully.
Final Tips
Start with simple recipes that tolerate gentle heat. Adjust the reflector every half hour to track the sun. Keep panels clean, smooth, and dry. Record times and temperatures to refine your technique. Share the design with friends and neighbors. A simple, fold-flat cooker empowers resilient, low-impact cooking anywhere sunlight reaches.