
A compact herb tower brings fresh flavors to your counter without daily watering chores. You can automate irrigation using simple parts and a budget smart plug timer. The tower uses stacked planters, a small pump, and 3D-printed emitters. With careful design, it stays tidy, quiet, and efficient.
This guide explains a reliable, modular approach for apartments and small kitchens. It favors affordable components and straightforward assembly. You will learn to size the pump, tune flow, and schedule watering cycles. Let’s start with what you need and why each piece matters.
Materials and Tools
- Stackable vertical planters or a compact tiered shelf with pots.
- Food-grade reservoir with lid, 10 to 20 liters capacity.
- Submersible DC pump, 200 to 400 liters per hour, low noise.
- Vinyl tubing, 6 mm inner diameter, plus 3 to 4 mm micro-tubing.
- 3D-printed drip emitters and a small manifold or distribution header.
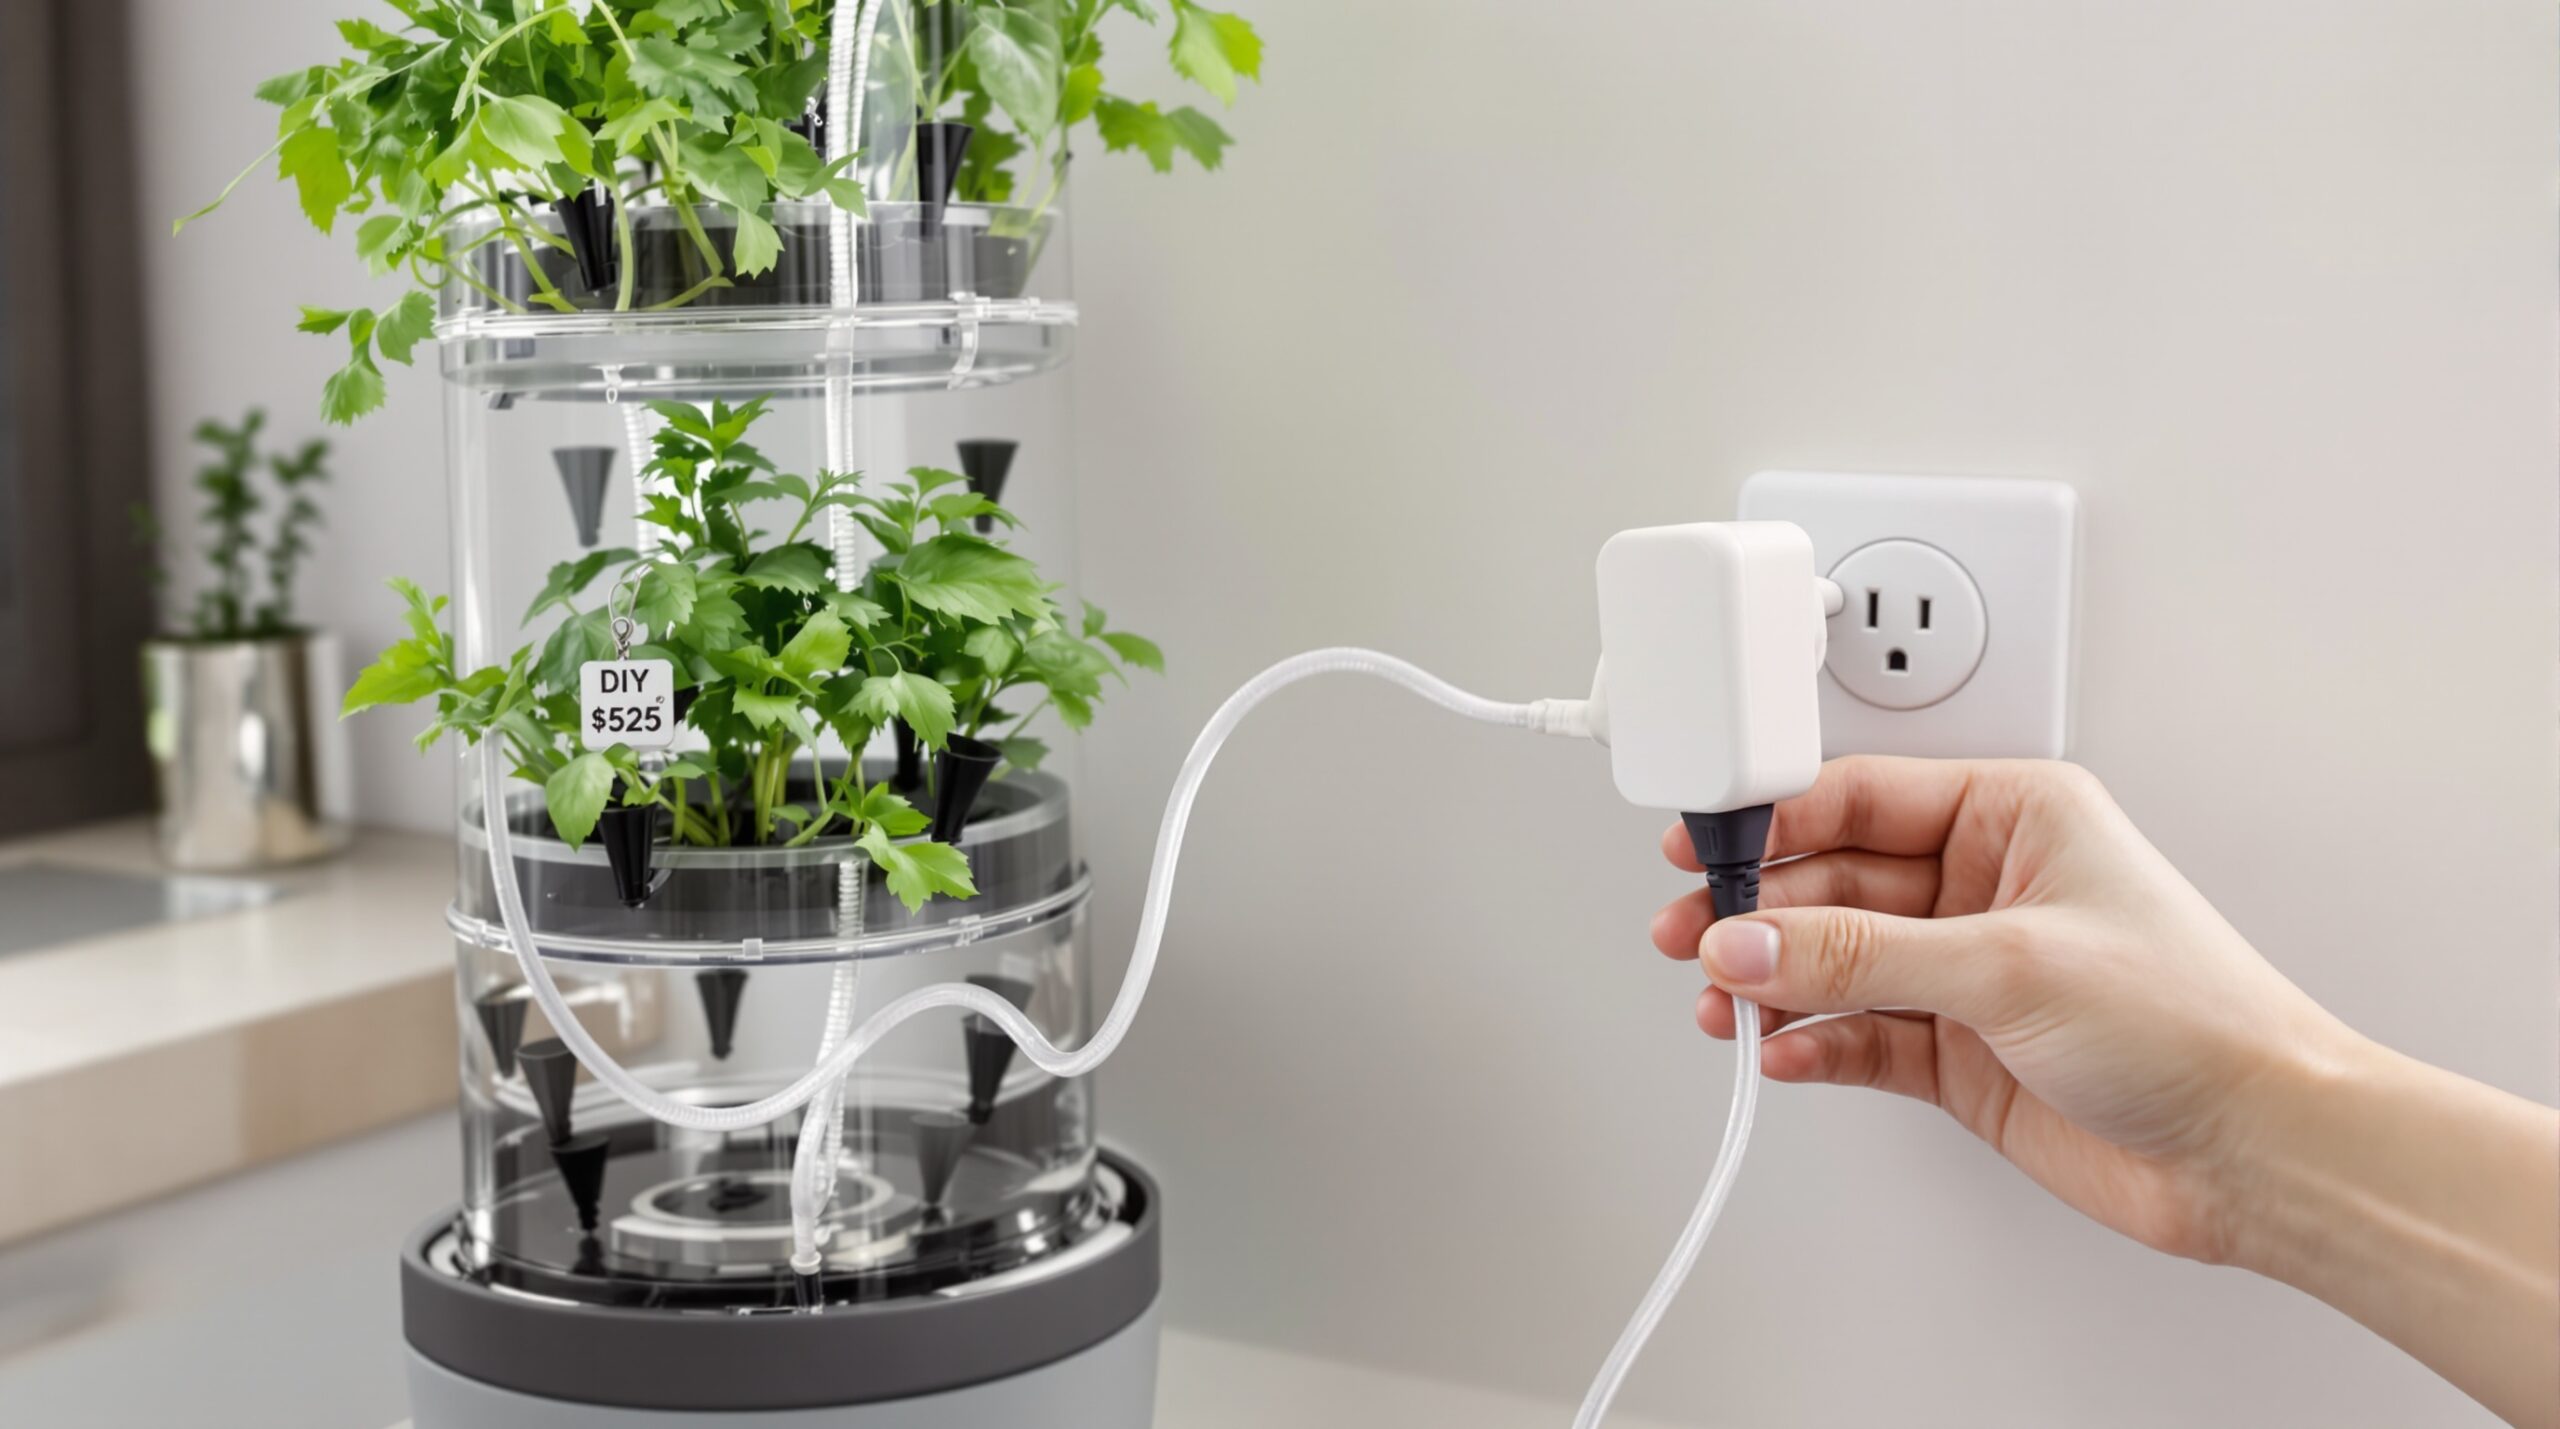
- $25 smart plug timer with app scheduling and local control.
- Check valve, optional pressure regulator, and a siphon-break hole.
- Cable ties, adhesive clips, and a waterproof catch tray for safety.
- 3D printer with 0.4 mm nozzle and PETG filament.
- Basic hand tools, drill bits, and a deburring tool.
Gather everything before assembling to avoid interruptions. Next, consider the tower layout and how water will return to the reservoir.
Design Overview
Design the tower to stand stably and resist splashes. Keep the footprint near 30 by 30 centimeters for kitchens. Use three to five tiers to balance height and maintenance access. Place the reservoir below the lowest planter for easy returns.
Plan a top-feed, bottom-drain loop. Water rises via the pump, drips across pots, and returns by gravity. Include a siphon-break hole near the outlet to stop unintended draining. This prevents surprise floods when the pump turns off.
Choose soil or inert media based on your preference. Soil offers simplicity for beginners. Coco coir and perlite support precise nutrition with hydroponic nutrients. Your layout supports either approach with minimal changes.
Printing Durable Drip Emitters
Print emitters in PETG for toughness and temperature stability. PLA can soften, and ABS may smell indoors. Use a 0.4 mm nozzle with 0.2 mm layers for consistent channels. Increase perimeters and infill to reduce porosity.
Orient parts so layer lines run along flow paths, improving strength and sealing. Add small barbed ends for micro-tubing. Ream holes with a drill bit for accurate diameters. Test each emitter for leaks under a sink before installation.
Do not assume prints are food-safe. Unsealed surfaces can harbor microbes in crevices. Consider a thin epoxy seal rated for potable water. That choice improves hygiene and cleaning ease over repeated cycles.
Pump, Manifold, and Tubing Sizing
Select a quiet pump delivering your total emitter flow plus head losses. Estimate 1 liter per hour per pot. Multiply by pot count, then add 30 percent for margin. Choose a pump that reaches your tower’s height comfortably.
Build a small manifold from printed tees or a drilled header. Feed each pot with equal-length micro-tubes for even distribution. Add a valve or pinch clamp to fine-tune flow. Keep tubing runs tidy with clips and gentle curves.
Install a check valve to prevent backflow into the pump. Drill a 1 mm siphon-break hole near the top feed. That hole vents air when the pump stops. It helps prevent a slow siphon from draining the reservoir.
Smart Plug Timer Programming
A $25 smart plug timer automates reliable irrigation schedules. Use an app with local schedules and manual override. Set short, frequent cycles to match herb needs and pot size. Start conservative and adjust after observing moisture levels.
For soil, try 60 to 120 seconds every eight hours. For coco coir, use shorter but more frequent pulses. Avoid runoff pooling by tuning duration carefully. You can create separate weekday and weekend patterns if needed.
Retain a backup schedule in the plug if the network fails. Many smart plugs store routines locally. Test a power outage to confirm recovery behavior. Confidence grows with a simple fail-safe routine.
Assembly Steps
- Place the reservoir on a stable surface under the tower.
- Mount the pump inside the reservoir with suction feet.
- Run the main tubing from the pump to the top manifold.
- Install the siphon-break hole just below the highest point.
- Attach micro-tubes from the manifold to each 3D-printed emitter.
- Fix emitters above soil surfaces to avoid channeling.
- Route a return tube or gutter back into the reservoir.
- Add a catch tray under the tower for extra protection.
- Secure all tubing with clips, avoiding sharp bends.
- Plug the pump into the smart plug timer.
- Fill the reservoir with water or diluted nutrients.
- Prime the pump and check for leaks under supervision.
- Program the plug schedule and run a test cycle.
- Adjust emitter spacing for even soil wetting.
- Label tubes for easier maintenance and replacement.
After assembly, you can start planting and refining the irrigation schedule. Monitoring the first week helps ensure stable performance.
Planting and Medium Choices
Choose compact herbs like basil, chives, thyme, and parsley. These tolerate close spacing and moderate moisture. Use a light, well-draining potting mix for soil setups. Add perlite to improve aeration and reduce compaction.
For coco coir systems, rinse and buffer the coir as recommended. Blend perlite for better air-filled porosity. Feed with a gentle herb nutrient at low conductivity. Track plant response and adjust feeding slowly.
Maintenance and Water Quality
Top off the reservoir with fresh water weekly. Replace the full volume every two to four weeks. Wipe salt crusts and algae from exposed surfaces. Keep the lid closed to reduce dust and evaporation.
Clean the pump impeller monthly to maintain quiet operation. Flush emitters with warm water to clear buildup. If the flow declines, soak the parts in diluted vinegar briefly. Rinse thoroughly before reinstalling components.
Use clean tap water or filtered water if necessary. Hard water can clog small channels over time. A simple inline mesh filter helps protect the manifold. Regular checks keep irrigation dependable and consistent.
Cost and Component Tradeoffs
You can build the tower affordably with careful sourcing. Expect the smart plug to cost around $25. Pumps often cost $12 to $30, depending on capacity. Planters, tubing, and fittings total another $25 to $45.
Filament and printing costs remain modest for small emitters. A reservoir tote and tray add about $15 to $20. Upgrades like valves and check fittings add several dollars. Overall, many build land under $120.
Spending slightly more on a quiet pump improves satisfaction. The timer affects convenience and reliability significantly. Balanced choices reduce tinkering later. The best setup supports your routine effortlessly.
Safety, Noise, and Spill Prevention
Use a GFCI outlet and a visible drip loop on the cord. Keep electrical connections above the floor. Place the reservoir where accidental bumps will not tip it. A catch tray offers critical protection on shelves.
Set vibration-damping pads under the pump and reservoir. That step reduces audible hum through cabinetry. Check for tube rub points that may buzz. Quiet systems feel invisible in daily kitchen routines.
Test emergency scenarios before leaving it unattended. Unplug the pump and watch for unwanted siphoning. Simulate a clogged emitter and observe tray performance. Small tests prevent big surprises later.
Troubleshooting Common Issues
If one pot stays drier, shorten its tube and increase emitter height. Balance lengths for equal head pressure. If runoff appears, reduce cycle time or emitter size. Soil crusting improves with light top dressing and gentle aeration.
If the pump runs dry, install a low-water marker on the reservoir. Refill before the next scheduled cycle. If algae grows, block light with opaque tubing or sleeves. Black tubing and a reservoir lid help greatly.
If Wi‑Fi drops, rely on stored local schedules. Many plugs keep time after outages. Test reconnection behavior and document procedures. Confidence grows with practiced steps and clear labels.
Upgrades and Scaling
Expand to more tiers by increasing pump capacity and manifold ports. Keep per-pot flow similar to earlier settings. Add a moisture sensor per tier for data-driven watering. Use the readings to adjust cycle frequency confidently.
Choose a smart plug that supports energy monitoring. The pump’s wattage spikes can indicate blockages. Integrate notifications for unusual runtimes. Simple alerts prompt quick checks before plants suffer.
Consider a backup battery for short power cuts. Most herbs tolerate brief pauses without harm. Redundancy protects schedules during storms. Scale carefully while preserving reliability and simplicity.
Why This Approach Works
Short, frequent irrigation keeps roots oxygenated and growth steady. Drip delivery avoids soggy soil and nutrient waste. The $25 smart plug provides flexible, resilient control. 3D-printed emitters adapt easily to your space and preferences.
Every choice supports easy maintenance and tidy operation. The tower fits tight spaces without sacrificing plant health. You gain fresher flavor with less effort. That practical outcome encourages continuous use year-round.
Final Tips for Success
Start with three herbs and dial in your schedule. Add tiers once watering feels consistent and predictable. Keep a small notebook or app log of changes. That record speeds future troubleshooting and optimization.
Use scissors to harvest lightly and encourage branching. Rotate pots weekly for even light exposure. Wipe leaves to remove dust and improve photosynthesis. Consistent care keeps flavors vibrant and aromatic.
With these steps, your herb tower waters itself reliably via a simple timer. The 3D-printed emitters deliver targeted, even moisture. Your kitchen gains fragrance, freshness, and convenience. Enjoy the harvest with minimal daily maintenance.