
Portable air quality monitors empower you to measure what you breathe anywhere. This compact project tracks CO2 and particulate matter with reliable sensors. An ESP32 handles data, display, logging, and wireless connectivity. The design uses off-the-shelf parts and simple wiring. You can assemble it on a bench in a weekend. Let’s walk through the hardware, firmware, and calibration steps.
Bill of Materials
Choose parts that balance accuracy, size, and power. You can swap sensors based on budget and availability.
- ESP32 development board (ESP32-WROOM DevKitC or equivalent)
- NDIR CO2 sensor (Sensirion SCD30 or SCD41, or Senseair S8, or MH‑Z19C)
- Particulate sensor (Sensirion SPS30, Plantower PMS5003, or PMSA003I)
- Environmental sensor (BME280 or SHT31 for temperature and humidity)
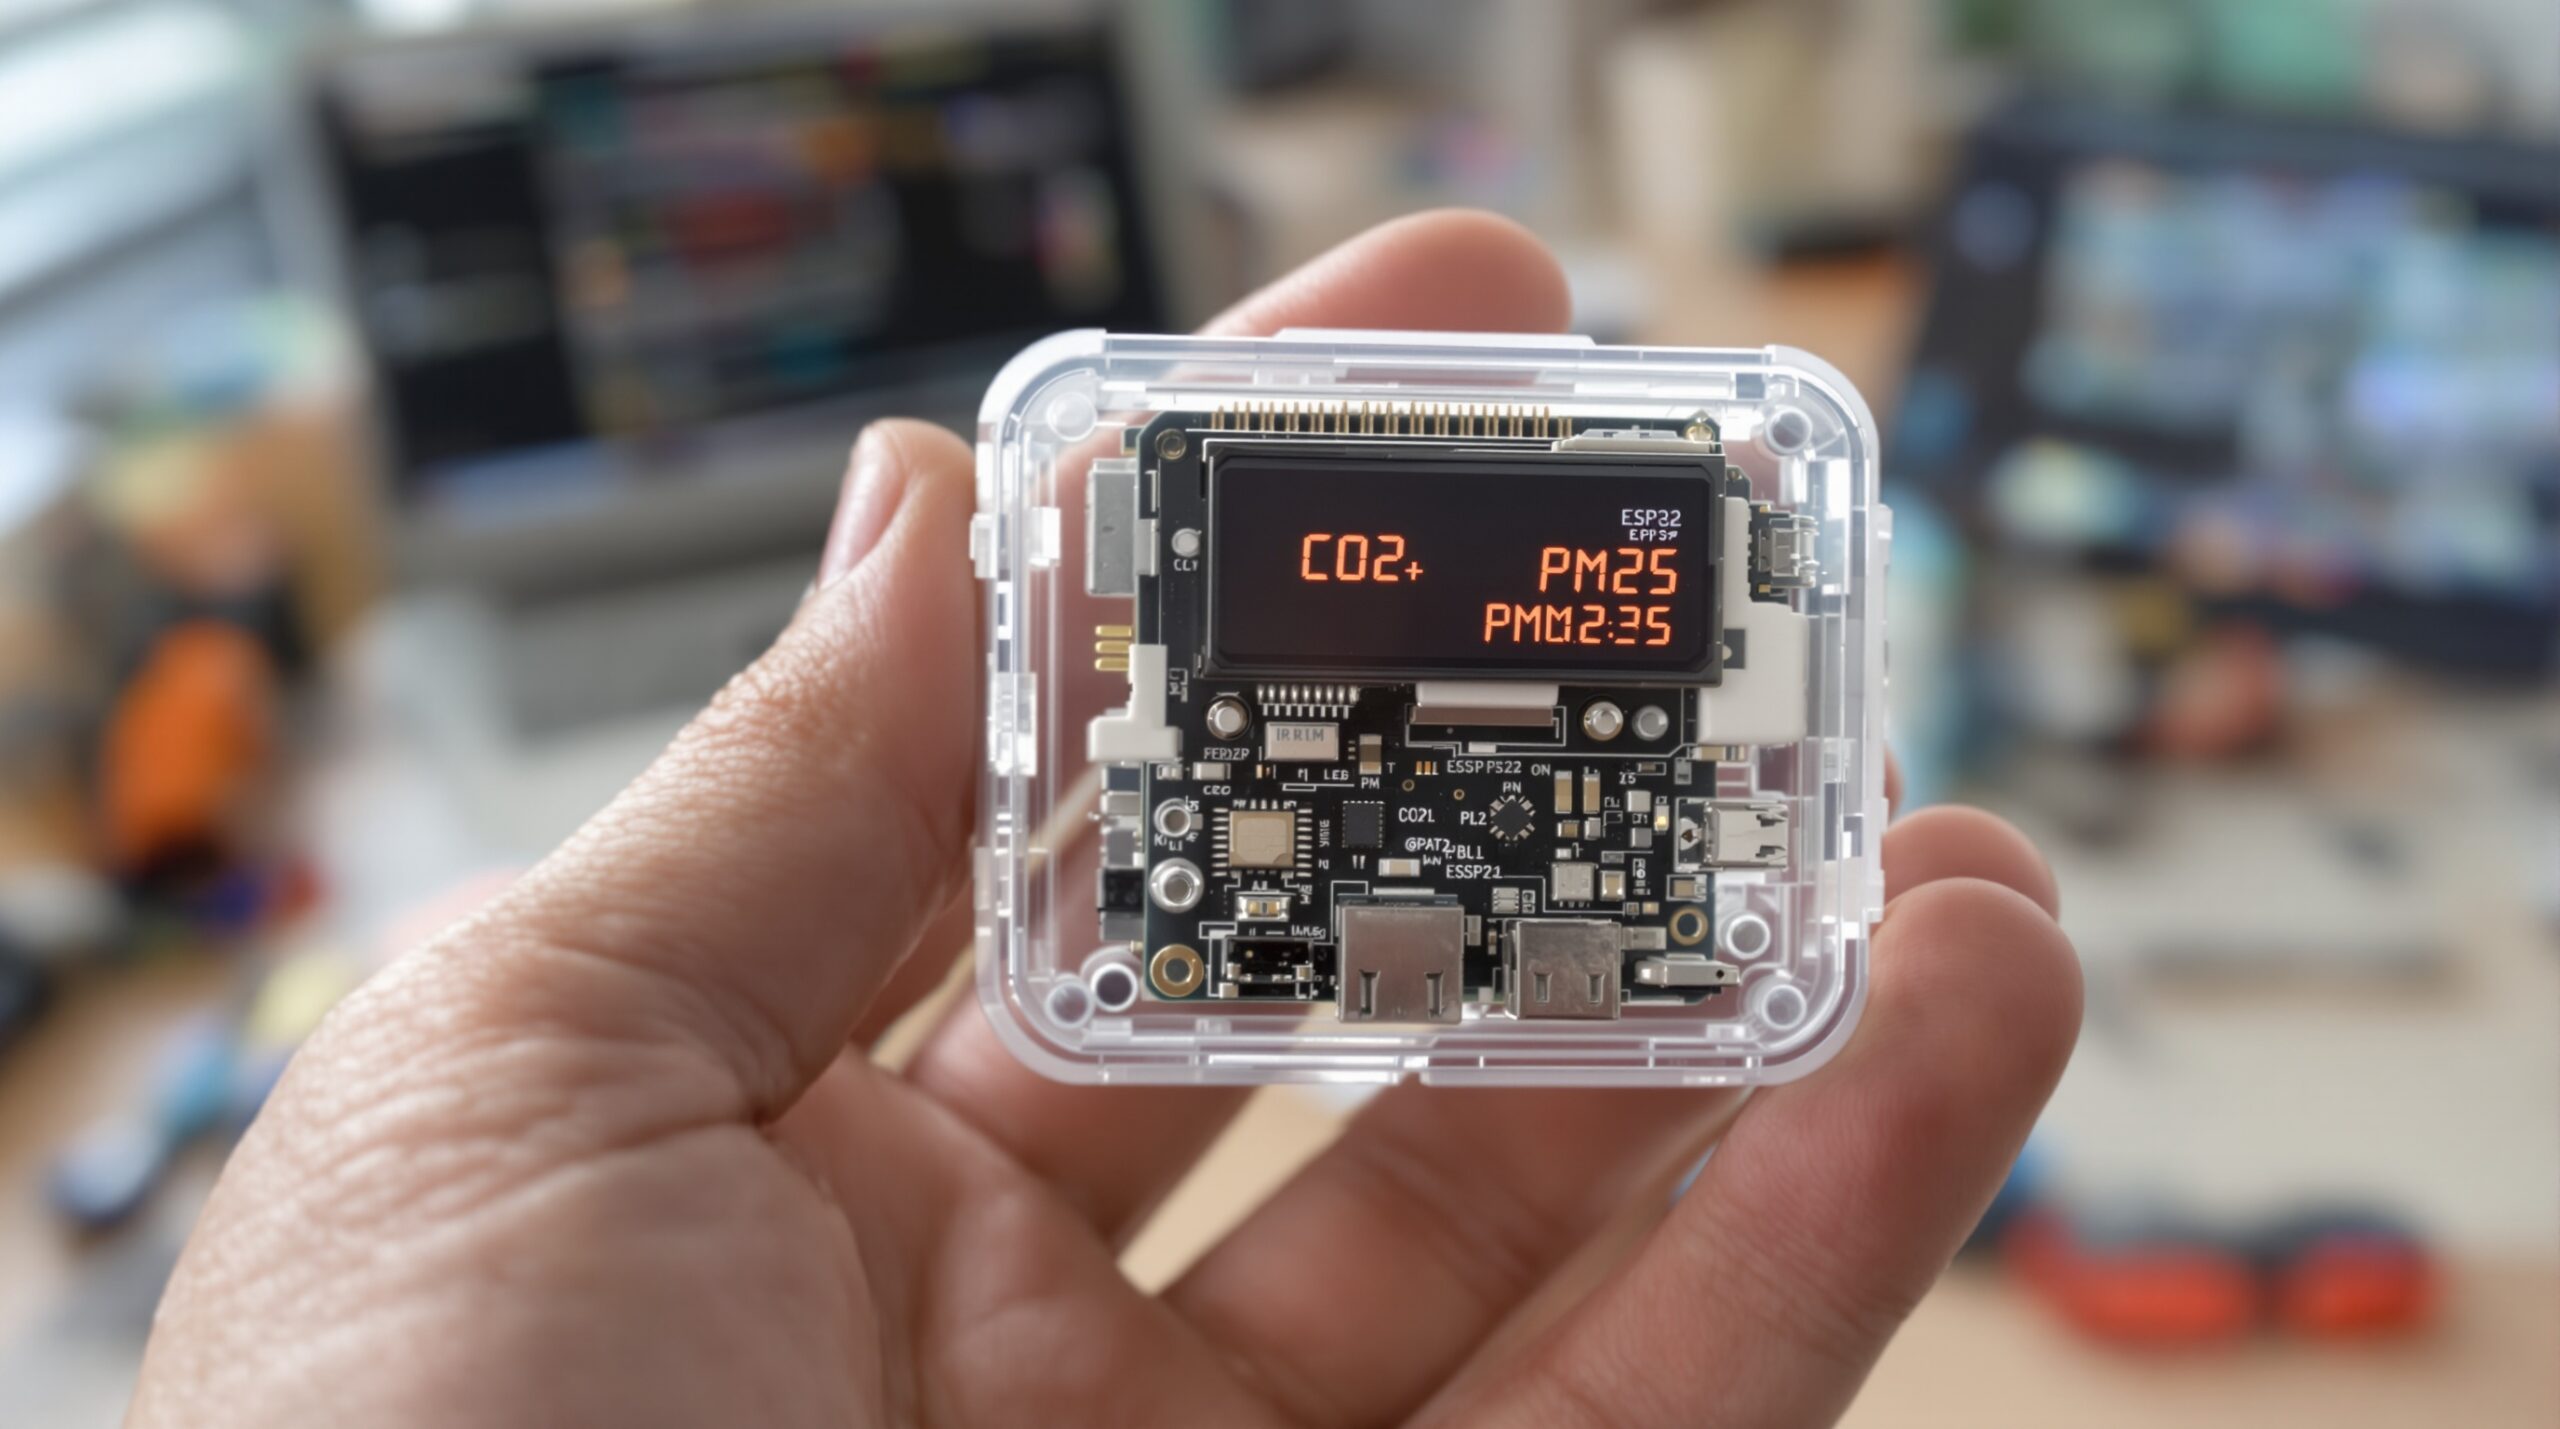
- 0.96‑inch OLED display (SSD1306, I2C)
- LiPo battery (500–1200 mAh, flat pouch)
- LiPo charger module (TP4056 with protection, USB‑C preferred)
- 3.3 V buck regulator if needed, or use onboard regulator
- Power switch and JST‑PH battery connector
- MicroSD module and card (optional, for logging)
- Slide-on particulate sensor cable or JST‑GH leads
- Wires, headers, heat shrink, and small screws
- 3D printed or laser‑cut enclosure with vents
Design Overview and Sensor Selection
A pocket monitor must stay small without sacrificing key measurements. CO2 indicates ventilation effectiveness and occupancy. Particulate matter reflects combustion and dust exposure. Temperature and humidity contextualize readings and improve compensation. A tiny screen provides local feedback without a phone.
Select an NDIR CO2 sensor for accuracy. SCD41 offers tiny size and low power. SCD30 provides proven performance with simple I2C control. Senseair S8 balances value and robustness. Avoid non‑NDIR eCO2 sensors for serious ventilation decisions.
Pick a particulate sensor that fits your enclosure depth. SPS30 resists contamination and supports I2C. PMSA003I is compact and commonly available. Ensure the sensor has a clear air inlet and outlet. Orient fans and ducts to prevent recirculation.
Use a BME280 or SHT31 for temperature and humidity. These sensors help compensate CO2 readings for humidity effects. They also stabilize particulate measurements through dew monitoring. An SSD1306 OLED keeps current draw low yet readable.
An ESP32 provides Wi‑Fi, BLE, and ample processing headroom. It supports OTA updates and secure MQTT publishing. You also get deep sleep for better battery life. The ecosystem offers mature libraries for all listed sensors.
Electrical Architecture and Power
Plan a clean power path before placing parts. The LiPo connects to the charger module and then the switch. The switch feeds the ESP32 and sensors through the 3.3 V regulator. Keep sensor grounds star‑connected near the ESP32 ground.
Check the current draw for safe battery sizing. Many NDIR sensors draw 19–120 mA during measurement. Particulate sensors can draw 80–120 mA with the fan running. Size the battery to last a typical day. Use thicker traces for power lines.
Link I2C devices to ESP32 pins 21 and 22 by default. Use level‑appropriate logic at 3.3 V. Give UART particulate sensors dedicated RX and TX pins. Keep I2C pullups modest, around 4.7 kΩ.
Route the fan’s airflow away from the CO2 sensor. Turbulence can bias readings, especially with drafts. Add foam baffles if space allows. Keep the OLED near the case window to improve visibility.
Test power rails under load using a USB power meter. Watch for brownouts when the fan starts. Add a 100 µF capacitor near the fan connector. This simple fix reduces voltage dips.
Assembly Steps
Prepare the ESP32 and Power Subsystem
Solder header pins to the ESP32 for stable connections. Mount the charger module near the USB opening. Wire the battery to the charger’s B+ and B− pads. Connect the charger OUT to the switch and regulator input.
Verify the 3.3 V rail before attaching sensors. Measure voltage during a simulated load with a resistor. Confirm the switch cleanly disconnects the system. Secure the battery with tape or a printed cradle.
Wire the CO2 Sensor
Connect SCD30 or SCD41 using I2C to the ESP32. Tie VIN to 3.3 V or 5 V per datasheet. Connect GND, SDA, and SCL with short twisted leads. Keep the sensor away from heat sources and regulators.
Mount the sensor with vents facing ambient air. Leave a few millimeters for airflow clearance. Add standoffs to avoid case conduction. Label the connector for easy servicing.
Wire the Particulate Sensor
Use the provided JST cable for secure connections. Connect 5 V or 3.3 V according to the module’s rating. Assign UART pins and confirm logic levels. Orient the inlet toward a slotted vent.
Prevent fan vibration from reaching the PCB. Add a thin foam pad under the sensor. Keep the exhaust path clear for steady airflow. Avoid sharp bends near the vent slots.
Wire the Environmental Sensor and Display
Place the BME280 or SHT31 near a vent hole. Connect it to the I2C bus with short leads. Mount the OLED behind a clear window. Route its I2C lines alongside the environmental sensor wires.
Bundle wires with heat shrink to reduce strain. Add a small right‑angle header for serviceability. Confirm the display and sensors share pullups. Secure everything before closing the case.
Firmware Setup
Use Arduino IDE or PlatformIO for quick development. Install the ESP32 board support package. Add libraries for SCD30 or SCD4x and your particulate sensor. Include Adafruit SSD1306 and BME280 or SHT31 libraries.
Initialize I2C and UART ports in setup. Probe sensors and report failures on the display. Read CO2, PM1.0, PM2.5, and PM10 at one‑second intervals. Combine temperature and humidity for compensation tasks.
Display key values with clear units and icons. Update the screen sparingly to save power. Publish data over MQTT if Wi‑Fi is available. Provide a status line for the connectivity state.
Data Processing and Calibration
Apply median filtering to reduce spikes from fan turbulence. Use an exponential moving average for smooth trends. Clamp unrealistic jumps to prevent display flicker. Log raw values alongside filtered numbers.
Enable ABC for NDIR sensors if usage supports outdoor exposure. ABC assumes periodic access to fresh air baselines. For indoor‑only devices, disable ABC and calibrate manually outdoors. Record baseline offsets in nonvolatile storage.
Compensate CO2 readings with temperature and humidity data. Update compensation coefficients during initialization. Validate updated readings against reference values. Adjust filters to match your user experience goals.
User Interface and Indicators
Use color cues on the OLED by drawing icons and labels. Show CO2, PM2.5, temperature, and humidity clearly. Add a battery icon and Wi‑Fi status indicator. Provide a button press to toggle detailed screens.
Show warnings when values exceed set thresholds. Offer concise guidance like “Open a window.” Keep the interface readable in bright light. Update values at a steady cadence.
Connectivity and Logging
Add Wi‑Fi configuration using a captive portal library. Store credentials securely in preferences. Publish JSON payloads to an MQTT broker. Include timestamps and device identifiers in each message.
Offer BLE advertising for quick values without pairing. Implement OTA updates for future enhancements. Use microSD logging if you need offline records. Sync time with NTP on boot and daily.
Compress logs by reducing precision where acceptable. Rotate files daily to manage card wear. Include error events and reboot reasons. This data helps diagnose field issues quickly.
Enclosure and Thermal Management
Design the enclosure with separate airflow paths. Keep the CO2 and particulate inlets apart. Add louvers to reduce light leaks. Provide finger access to the power switch.
Use PETG or ABS for better heat resistance. Avoid placing the battery near the fan exhaust. Vent heat from the ESP32 and regulator upward. Add a wrist strap slot for portability.
Seal light paths that might affect optical sensors. Use matte black interiors to minimize reflections. Add labels for ports and vents. Confirm pocket comfort during daily carry tests.
Validation and Troubleshooting
Test CO2 outdoors for a baseline near 420 ppm. Confirm indoor readings respond to occupancy changes. Breathe near the inlet to check the dynamic response. Observe a gradual decay when you step away.
Validate particulate response using incense or a match. Expect PM2.5 to spike quickly during smoke exposure. Watch it decay as air clears. Compare results against a reference monitor if available.
Check power stability under peak fan loads. Fix brownouts using larger bulk capacitors. Verify UART framing and baud rates for particulate sensors. Use serial logs to isolate communication issues.
Power Optimization
Duty cycle the particulate fan when real‑time data is not required. Reduce the OLED refresh rate to save energy. Lower Wi‑Fi transmit power where possible. Use deep sleep between measurements when logging slowly.
Enable light sleep during idle loops with careful timing. Cache calibration values to avoid extra sensor work. Profile the current draw in different modes. Choose a battery that meets your runtime goals.
Maintenance and Safety
Replace dust filters or screens when visibly dirty. Keep vents free from lint and debris. Update firmware to improve accuracy and features. Store the device away from high heat or direct sunlight.
Do not rely on the device for life‑critical decisions. Consumer parts carry tolerances and drift. Cross‑check suspicious readings with another instrument. Calibrate outdoors monthly to maintain confidence.
Cost, Upgrades, and Next Steps
Expect a parts cost between $70 and $160. Prices vary with sensor selection and availability. SCD41 and SPS30 raise costs but shrink size. MH‑Z19C and PMSA003I lower costs at some tradeoffs.
Consider a small e‑paper display for sunlight readability. Add a vibration motor for silent alerts. Integrate a USB‑C PD trigger for faster charging. Explore a custom PCB to reduce wiring bulk.
Publish your data to a home dashboard with MQTT. Use Home Assistant or Grafana for visualization. Share your enclosure files and firmware online. Community feedback will help refine the design.
This compact monitor brings actionable air insights to your pocket. With careful assembly and calibration, it performs reliably. The ESP32 platform enables fast iteration and updates. You can now measure and improve the air around you.