
Dry homegrown herbs gently with a compact, solar-powered dryer that fits your window. This project upcycles picture frames and harnesses sunlight, airflow, and smart design. You will save energy, preserve flavor, and keep counters clear all summer. Follow this detailed guide to build a reliable, attractive, and low-cost unit.
The design uses stacked frames as drying trays and a slim solar collector. Warm, dry air rises through herbs, speeding moisture loss without harsh heat. Mount it inside a sunny window or hang it directly on a window frame. The footprint stays narrow, so curtains and plants still fit.
How the Window Dryer Works
Sunlight warms a dark absorber panel behind the trays, creating a gentle thermal draft. Cooler air enters at the bottom, warms, and rises through perforated trays holding your herbs. This stack effect carries moisture away and exhausts it near the top vent. The process maintains airflow without electricity when the sun is available.
Typical internal temperatures range between 90 and 120 degrees Fahrenheit on sunny days. Those temperatures protect aromatic oils while drying effectively. Aim for relative humidity inside the dryer below 50 percent during operation. A small solar fan can help on humid days or in shaded areas.
Materials and Tools
- Three to four wooden picture frames, 8×10 or 11×14 inches, glass removed
- Food-safe mesh or nylon screen for tray bottoms
- Fine stainless steel mesh for small leaves and seeds
- Thin plywood or corrugated plastic for the back panel
- Matte black high-temperature spray paint for the absorber
- Reflective foil tape or aluminum foil for interior edges
- Weatherstripping foam tape for sealing and spacing
- Small brass hinges or frame joiners for stacking alignment
- Rare-earth magnets or toggle latches for quick tray access
- Wood strips or dowels for spacers, 1/2 inch square
- Short screws, wood glue, and small finishing nails
- Optional 5V solar panel, 1–3 watts, with USB micro fan
- Digital thermometer-hygrometer with probe
- Fine sandpaper, drill, utility knife, and staple gun
- Non-toxic wood finish or food-safe mineral oil
Gather materials before you begin construction to avoid delays. Having options for mesh sizes helps accommodate diverse herb textures. Choose frames with sturdy rails to support trays without warping. Avoid treated woods or finishes that could off-gas under warmth.
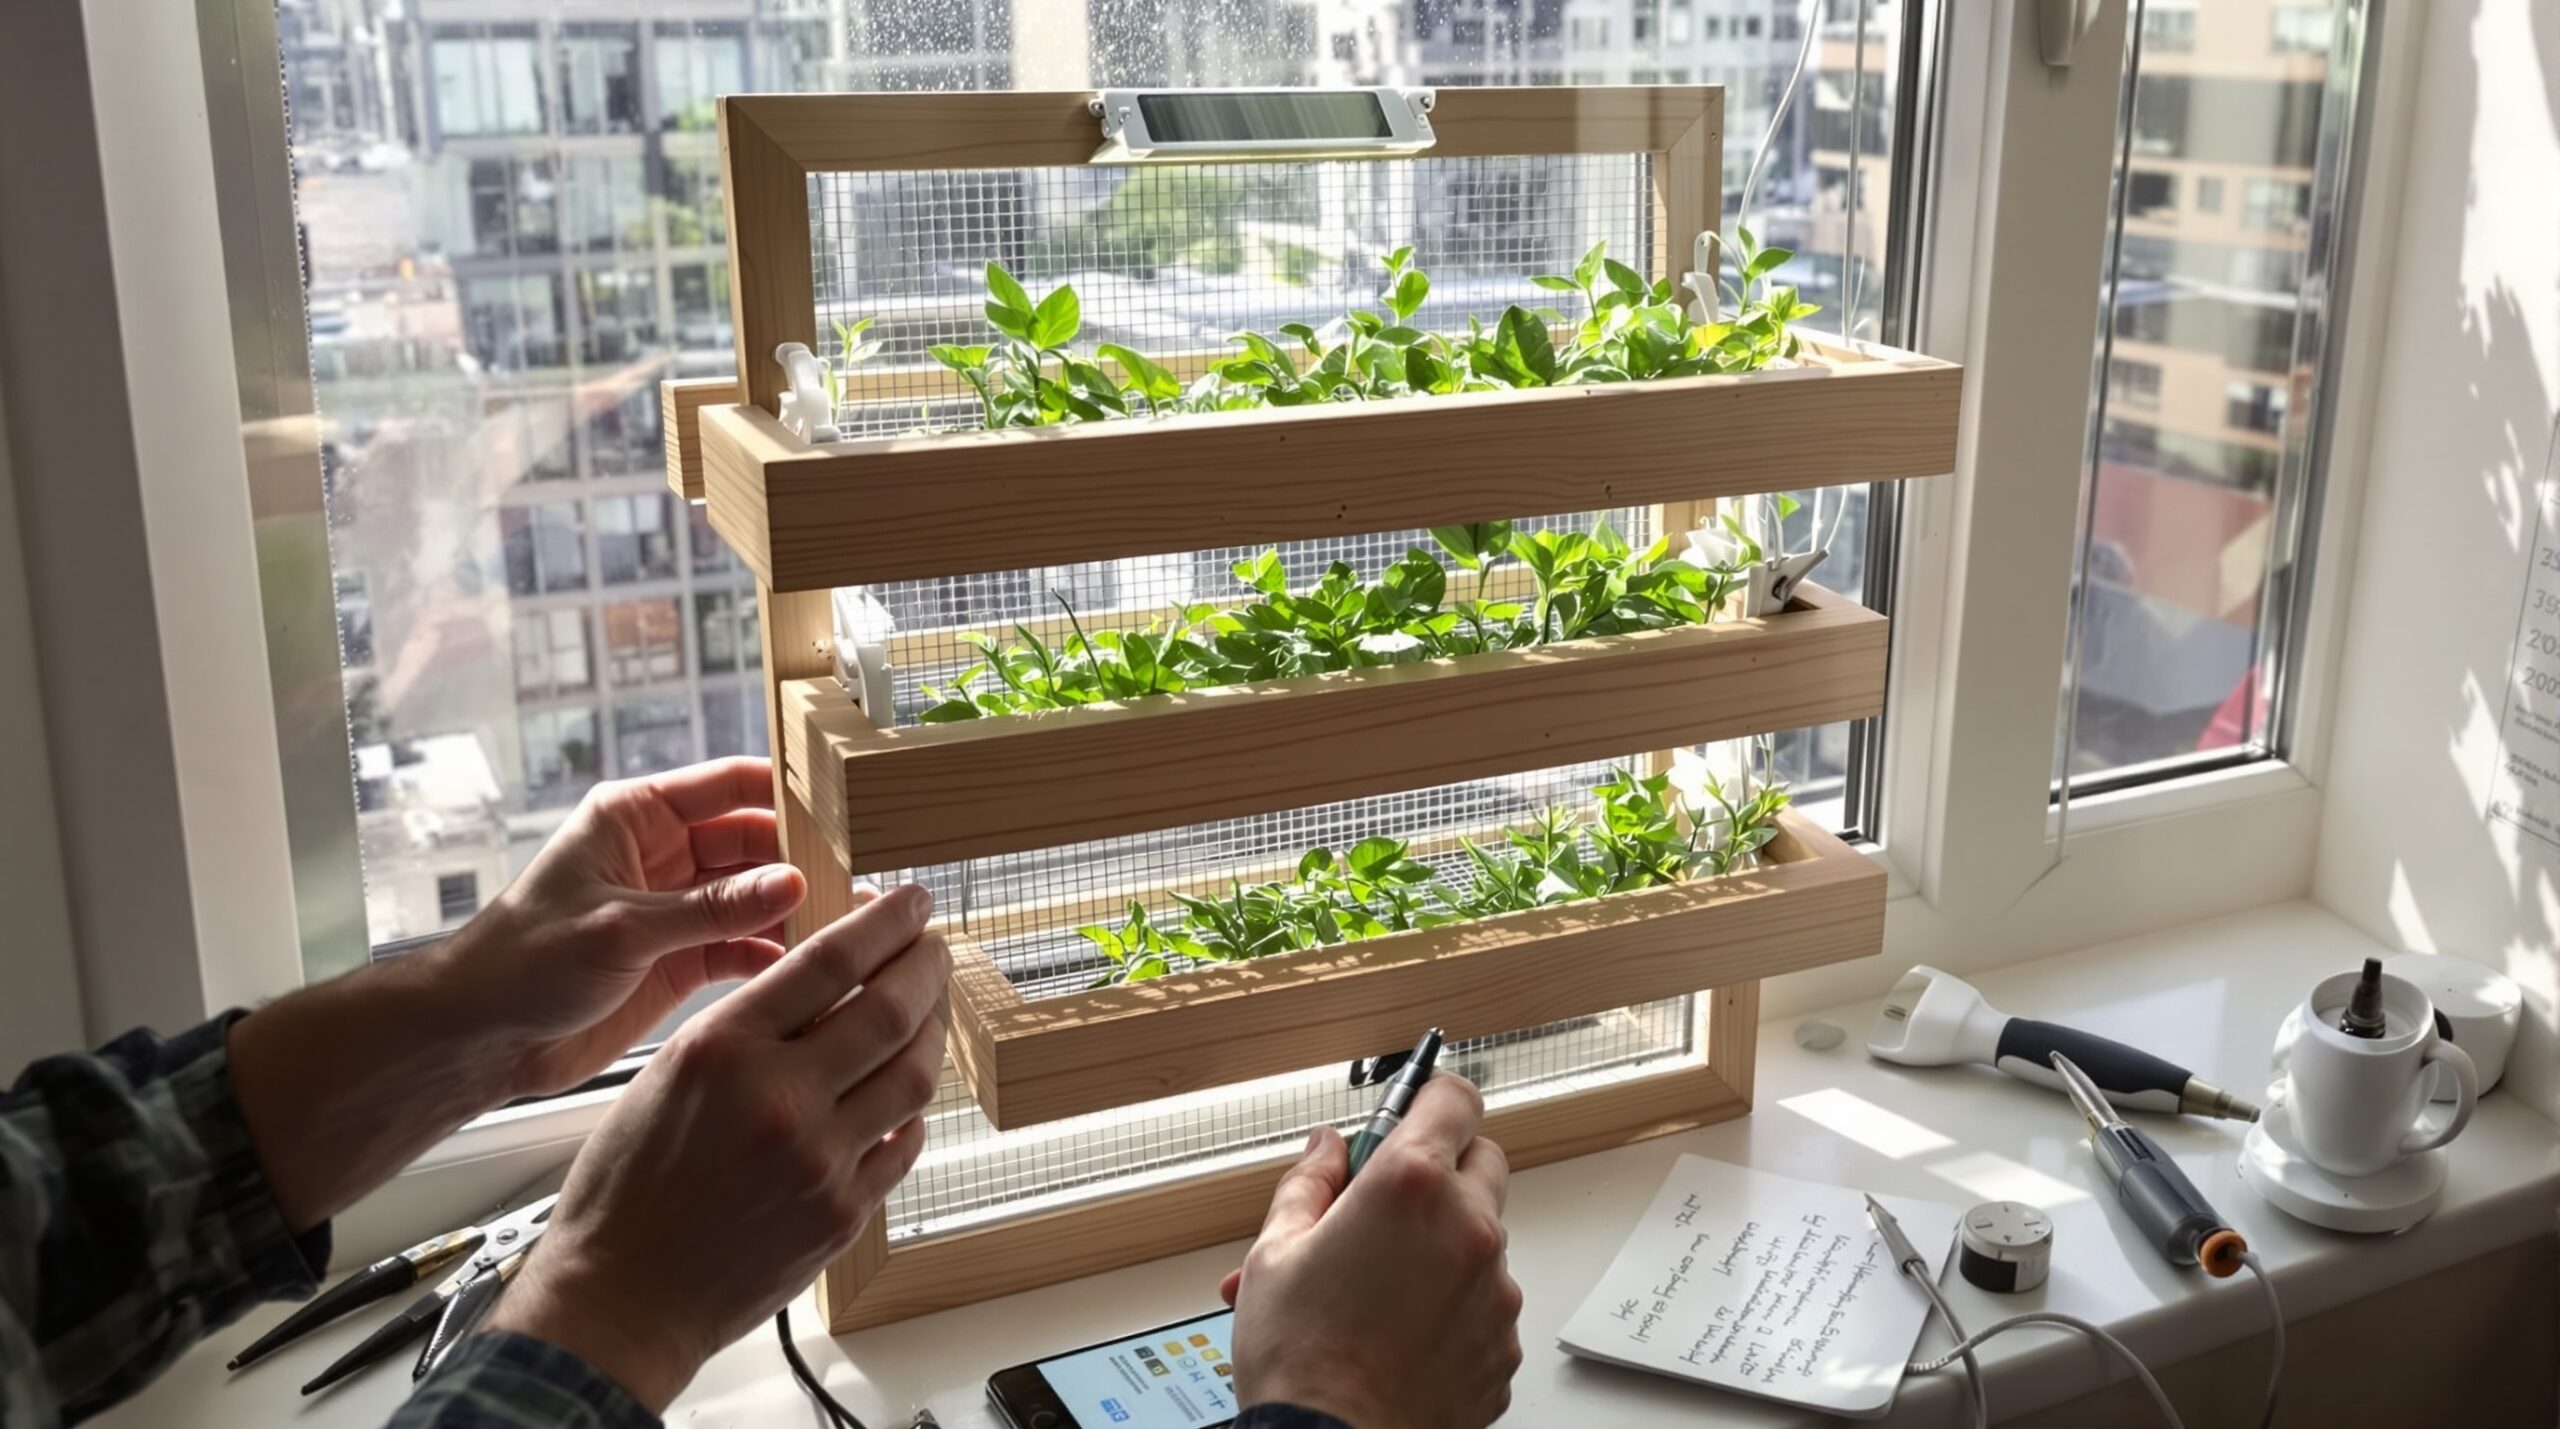
Design Dimensions and Layout
Plan a stack sized to your window width and desired capacity. Three trays suit small windows and daily harvesting. Four trays suit larger windows and bigger garden yields. Target an assembled depth of three to five inches for a slim profile.
Reserve the bottom for the intake and the top for the exhaust. Space tray layers using 1/2 inch strips at each corner. This spacing keeps airflow even while limiting heat loss. A continuous back panel supports the absorber surface and stiffens the assembly.
Step-by-Step Build
Prepare the Frames
Remove glass, backing, and hardware from all frames. Sand rough edges and check joints for looseness. Glue and clamp shaky corners until square. Apply a light, non-toxic finish to seal bare wood surfaces.
Next, mark bottom edges for intake gaps around the stack. Leave a continuous 1/4 inch gap at the bottom. This gap helps collect fresh air across the entire width. Mark the top edges for a similar 1/4 inch exhaust slot.
Build the Drying Trays
Cut mesh slightly larger than each frame’s opening. Stretch it evenly and staple it to the backside rails. Trim excess mesh carefully with a utility knife. Add a second, finer mesh for small leaves, if needed.
Then, attach narrow wood strips under long rails for extra stiffness. Avoid blocking the corners, which maintain airflow. Lightly sand any sharp staples or mesh edges. Finally, label trays for easy rotation during drying sessions.
Create the Solar Collector Back
Cut a back panel equal to the outer stack dimensions. Paint the interior face matte black to absorb heat. Let the paint cure fully to avoid odors during drying. Add foil tape along tray support lines to reflect light upward.
Install a thermometer-hygrometer probe through a small grommet near the middle. Seal the penetration with silicone for accuracy. Place adhesive weatherstripping around the back panel perimeter. This seal reduces air leaks and improves airflow control.
Assemble the Stack and Airflow Path
Lay the back panel face up on a flat surface. Position the bottom frame, ensuring the intake gap remains open. Add corner spacers and place the next frame above. Repeat layers until all trays sit evenly spaced.
Secure alignment with small hinges along one side. Use magnets or latches on the opposite side for access. Leave a 1/4 inch exhaust slot across the top. Install a simple hood above the exhaust to guide airflow.
Add an Optional Solar Fan and Panel
Mount a low-noise USB fan near the top exhaust. Wire it directly to the small solar panel. The fan runs only when sun is available, matching thermal conditions. This boost helps during humid weather or partial shade.
Alternatively, place the fan at the bottom intake. That placement gently pushes air upward through trays. Choose one fan location to avoid short-circuiting airflow. Test both positions temporarily to confirm the best performance.
Mount the Dryer in the Window
Position the dryer against a sunny, south-facing window for the strongest performance. Use adjustable sash brackets or removable adhesive hooks. Ensure the intake remains unobstructed along the bottom edge. Check that the exhaust vents freely at the top.
If the window frame is deep, add side seals with foam strips. These seals reduce drafts and improve temperature stability. Confirm that the unit remains secure when opening the window. Consider a safety tether for upstairs installations.
Operating the Dryer
Harvest herbs during late morning after surface moisture evaporates. Rinse only when needed and pat leaves completely dry. Spread herbs in a single, loose layer on trays. Avoid clumping stems, which slows drying and encourages uneven results.
Rotate trays every few hours for uniform drying. Monitor temperature and humidity with the built-in sensor. Ideal internal humidity stays under 50 percent during operation. Most tender herbs dry in one to two sunny days.
Thicker stems and seed heads require more time and patience. Strip large stems once leaves become leathery and pliable. Finish stubborn batches with the fan on bright afternoons. Store fully dried herbs immediately in airtight containers.
Safety, Quality, and Troubleshooting
Keep drying temperatures below 120 degrees Fahrenheit to protect essential oils. If temperatures climb, open the exhaust slightly more. Shade part of the absorber with a cardboard flap on hot days. Alternatively, shorten drying sessions during peak heat.
Watch for condensation on cooler mornings. Briefly prop the intake open to vent early moisture. Resume normal gaps once interior surfaces feel dry. Remove any leaves showing mold or off odors immediately.
Uneven drying often signals restricted airflow. Check that trays are not pressed tightly against the back panel. Increase spacer thickness if leaves are very fluffy. Clean screens regularly to maintain consistent passage of air.
Maintenance and Cleaning
Brush screens with a soft brush after each batch. Vacuum gently to remove fine particles and pollen. Wipe the back panel with a damp cloth when dusty. Avoid strong cleaners that might linger on warm surfaces.
Periodically check hinges, latches, and seals for wear. Tighten loose screws and replace tired weatherstripping promptly. Refinish wood annually with a light, food-safe treatment. Store the dryer indoors during off-season periods to extend its life.
Cost, Time, and Sustainability Benefits
Repurposed frames keep costs low and reduce waste significantly. Expect to spend between twenty and sixty dollars, depending on parts. The project requires about four to six hours for careful builders. Drying then uses free sunlight instead of grid electricity or fossil fuels.
The compact design preserves kitchen space and reduces clutter. Window mounting eliminates separate racks and bulky dehydrators. You gain fresh flavors without noisy appliances or ongoing utility costs. The dryer also teaches passive solar principles through daily use.
Variations and Upgrades
Add a removable insect screen over the intake for extra protection. Consider a clear acrylic door on the room side. That door reduces drafts while allowing inspection without heat loss. Install magnetic catches to keep the door secure yet accessible.
For cooler climates, insulate the back panel with thin foam. Keep the absorber surface uninsulated toward the window for heat gain. Integrate a larger solar panel if you prefer stronger airflow. Use a USB speed controller to fine-tune fan output.
You can scale the design for apartment or homestead needs. Narrow frames suit small windows and single cooks. Wider frames suit bay windows and avid gardeners. Always preserve intake and exhaust ratios to maintain airflow.
Final Tips for Reliable Results
Label jars with herb names and drying dates for quality tracking. Store in cool, dark cabinets to preserve color and aroma. Check stored jars after a week for hidden moisture. If condensation appears, redry briefly and reseal the containers.
Keep a simple log of weather, times, and outcomes. This record reveals patterns that improve future batches. Adjust intake gaps and fan use based on seasonal humidity. Over time, your dryer will perform predictably across changing conditions.
With careful construction and mindful operation, this window herb dryer will serve for years. Your kitchen gains steady supplies of flavorful, home-dried herbs. Enjoy lower energy use, quieter kitchens, and better-tasting meals. Start collecting frames and turn sunlight into delicious, preserved harvests today.